
Respraying your car is important to get rid of all the scrapes and dings on your vehicle’s paintwork and transform its outlook. Whether you want to modify your car’s shade or need to bring your classic vehicle back to its original condition, upgrading its condition before selling, or need to add something to stand out among the crowd, respraying is the best option.
However, you can’t go wrong with your car respray. Therefore, we’ll be sharing easy-to-navigate car respray steps covering every aspect of the process. You just need to follow the steps to achieve a fine car respray.
Table of Contents
ToggleFrom Matte to Metallic: Car Respray Paints Explained
Car sprays not just come in different shades but in different finishes as well. If you want to find the right match for your car, you can visit the specific sites and enter the model, colour, and year, and the websites will share a list of matches:
- Matte Finishes: The ultimate choice for luxury cars, matte finish is not as common as other finishes, certainly costs a lot, and comes with maintenance issues. However, the surface finish that it provides is popular for its high-end texture and appearance, which makes it uniquely premium than its counterparts.
- Pearlescent Paint: If you want shimmer instead of a radiant glow, then pearlescent paint is the go-to solution. Workers add mica or ceramic crystals, which offer a sparkle or refracted outlook that glitters as you drive along.
- Solid Paint: This is the most sought-after option for car resprays, often added as a single coat with a protective varnish layer over the top before your car comes off the production line. The most popular options for solid paints include black, white, red, and blue.
- Metallic Paint: This paint type is also the same as a solid paint, but with a trivial quantity of metallic powder added. The prices are also more or less the same as the solid type; however, you can get charged more at the garage because it requires the application of multiple layers.
Spray It Right: The 5-Step Method
Getting the Surface Ready
Around two-thirds of the work is preparation, and the right preparation is paramount to successfully respraying the car. To prepare the car, you first need to deal with any dents, bumps, and defects on the surface. The reason is that when you spray your car, even the tiniest dent or defect becomes visible.
If you’re not fully peeling off the paint, then you can clean the surface by washing your car with a good cleaning solution that does not contain wax. Allow the car to dry properly and brush off any dust, wax or other surface material, as they will affect the paint’s adherence to the surface. You can use two different methods to prepare your car:
- Cutting: In this car-prep technique, you use an abrasive compound to get rid of any thin layers of paint. You can apply the compound using a circular motion, but be sure to use the right compound for the job, as there are several available on the market.
- Sanding: This method involves using abrasive materials to remove the top layer of your car’s paint. You can perform sanding with either an electric orbital sander or sandpaper while utilizing different grades of paper, depending on the job. Remember that sanding is a time-consuming task, as each panel will take a couple of hours at a minimum. So, adjust your pace and time accordingly.
Masking
Masking parts of the car during a respray can be devastating and time-consuming (to respray the painted area) so you wouldn’t want that. Thus, you need to put special effort to cover all such parts like windows, trims, handles, tyres, lights, badges, or mirrors, that are exposed to the paint exposure.
Priming
If your plan is to get rid of the paint down to the metal, then you are going to need to add a primer before doing the full respray. This basically seals the surface and develops a shielded barrier so you will probably need to add at least a couple of coats to ensure the entire area is properly covered.
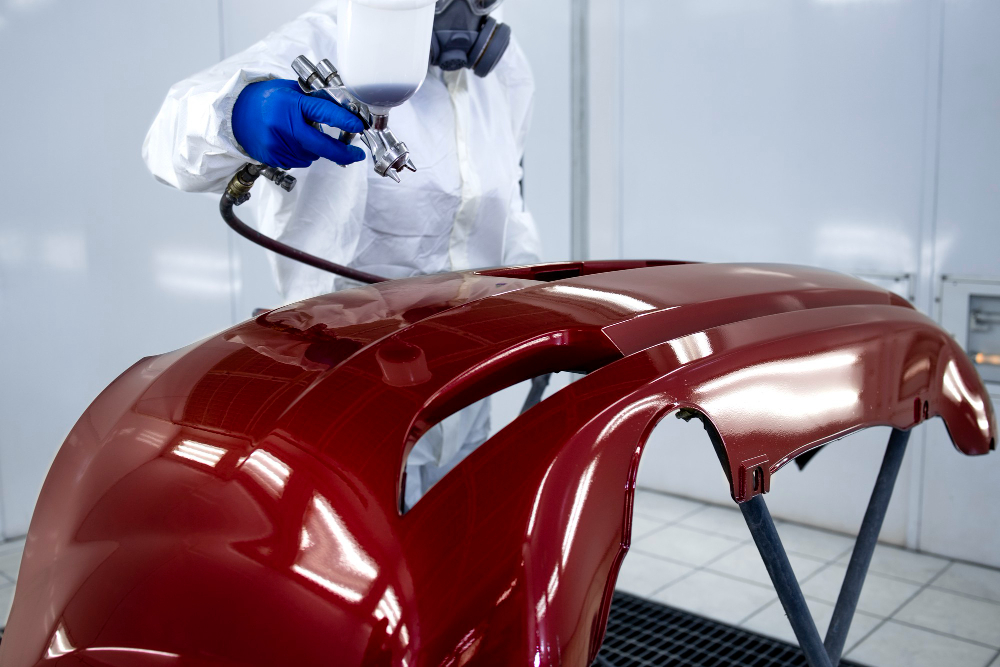
Spraying
This is the main step of the process and often the most arduous to perform. Because one wrong move, and you’ll have to do the job all over again. Our pro tip is that if you’re going to spray a small area, it’s better to practice your technique first before spraying the real surface.
You don’t need to spray the entire surface in one go with a thick coat, but lay down a thin layer each time you make a pass. If you are spraying the entire vehicle, focus on spraying the entire vehicle rather than painting each panel to avoid risking uneven paint thickness. Between each coat, you need to leave at least an hour for drying.
Applying Lacquer
Applying a high-quality lacquer coat is the final step for several paints. You need to apply several thin layers and leave the coat for a few days before applying a fine-quality wax.
A Few Last Words!
That’s it! You’re all set to enjoy your new car with a respray that will definitely make it stand out and look as original as on your first purchase. However, don’t forget that car spray is not a health-friendly option as it is often carcinogenic. So, you need to wear protective gear, like a mask and specs, before perform a respray.
Also, you need to make sure that you perform your car respray in a properly ventilated space. Don’t forget to abide by the local regulations about painting jobs. If you require professional car sprays or resprays, reach out to GMP Autos LTD. – a professional car servicing company offering all kinds of car detailing facilities, including resprays.

